


![Build a Custom Color Palette App [Part One]](https://cdn.hashnode.com/res/hashnode/image/upload/v1647648090580/nWDM48hY0.png?w=1600&h=840&fit=crop&crop=entropy&auto=compress,format&format=webp)
Table of contents

No headings in the article.
The developer community have differing opinions of when a person should call themselves a developer, most people believe that you are not a developer unless you have a tech job and work in a FAANG company (P.S: If you don’t know what FAANG means, it is simply an acronym for Facebook, Amazon, Apple, Netflix and Google, of course there are variations of this acronym such as MANGA, where the M stands for Meta, and AMANGUS, where U and S stands for Uber and Spotify respectively! The point is, FAANG are giant tech companies.) Every member of the developer community will agree that working for a FAANG is a big deal, however, most tech people are of the opinion that you don’t have to work for one to call yourself a developer.
Some people are of the opinion that once you start learning how to code, you can call yourself a developer no matter what language you are learning even if it is HTML. I partially agree with that thinking; in my opinion, unless you actually build something with the language you are learning, you cannot really prove that you have learned the language. So for example, if you are learning HTML, you need to build a web page, if you are learning CSS you need to style a web page, and if you are learning JavaScript, you need a project making use of HTML, CSS and JavaScript to create an interactive web page. Once you can do this, you have developed something and can now confidently call yourself a developer no matter what anyone says.
Color Palette App
A Color Palette app is the simplest form of JavaScript project you can build, this project is so common that most developers have built one. The next common JavaScript project is a browser game of sorts but more about that in subsequent articles.
Color Palette apps come in different flavors, the most common being the random color generators. The purpose of these apps is to help designers and web developers have various color codes to use in their projects without having to stress about which color to use. Having a color palette handy will save a lot of time and will of course make the design uniform.
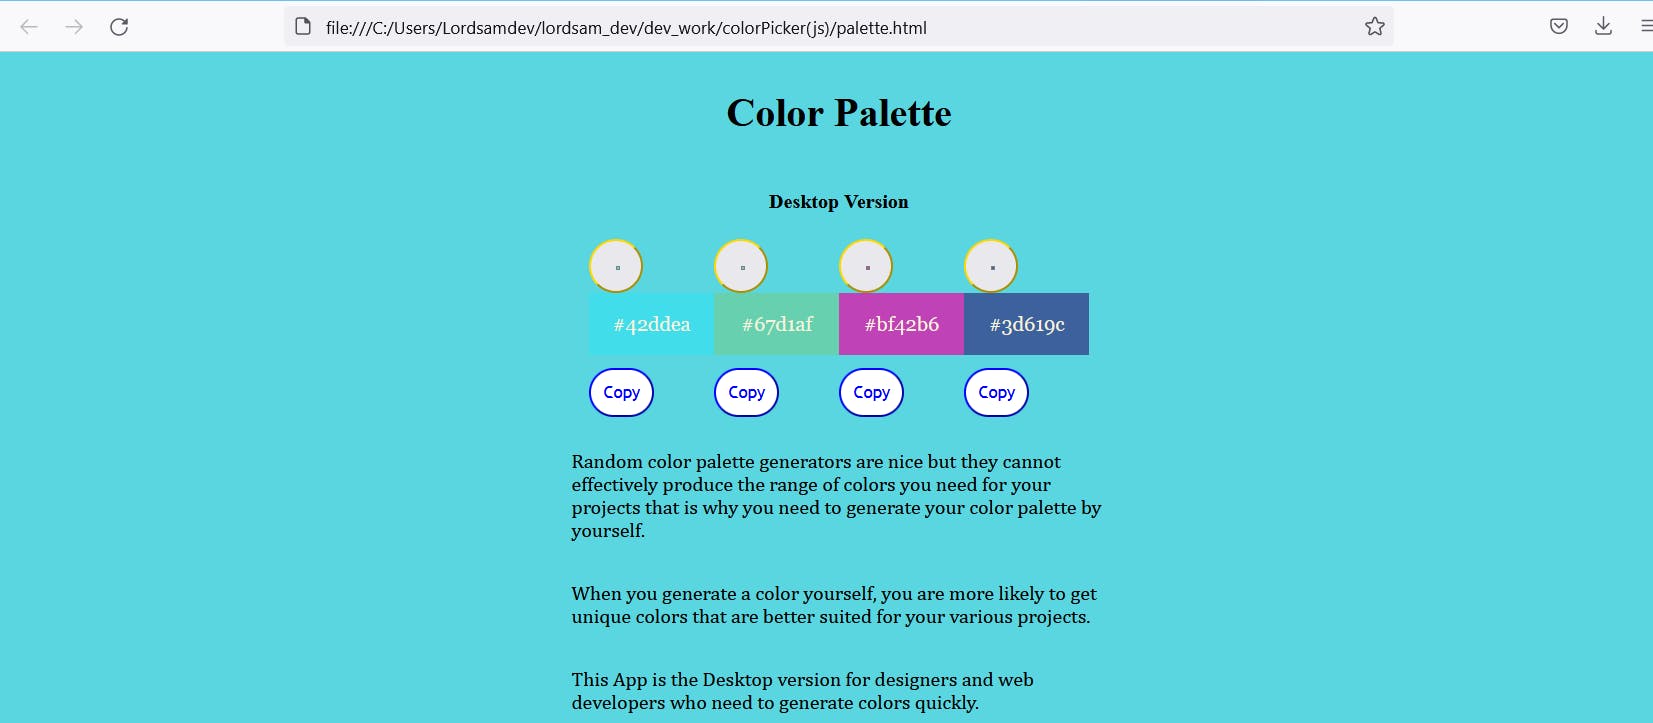
In this tutorial, I will teach you how to build a special type of color palette app that the user can use to generate desired colors by playing with a color picker. Once the desired color is selected, it displays the color as well as its hexadecimal code like in the screenshot below:
JavaScript concepts you will learn in this tutorial includes:
1. DOM manipulation
2. Event listeners
All the code for this project are available here %[github.com/Lordsamdev/Color-Palette], I also created a mobile version, which uses the same palette.js file but its HTML and CSS are different.
Step One: Create an HTML Page: If you are learning JavaScript, it is assumed that you have some knowledge of HTML. HTML is the markup language that serves as the structure of every web page, and your JavaScript is meant to manipulate this HTML.
In your HTML, within the body tag create a div and give it a class “main” like so:
<div class = “main”></div>
This div will contain every aspect of the color palette, this is also to prevent the styling of the body tag from affecting the structure of the color palette.
After the main div has been created, it is time to create the first color box. Color boxes in palettes are a group of rectangles close together where different colors will be displayed along with the hexadecimal code of each color, in this app, we need four rectangles and to create them we use the div tag once again.
Since each box will have a color picker responsible for changing its color, we also need four color pickers, then each box will have a button whose purpose is to copy whatever color is displayed on each box. To achieve all these, we need a div tag to hold each color box, its color picker and its button. This means that apart from four color boxes, we need four color pickers and four buttons, therefore we need four divs like this:
<div class = “first”></div>
<div class = “second”></div>
<div class = “third”></div>
<div class = “fourth”></div>
In the first div, create a color picker using the following code:
<input type="color" name="" id="select1">
Next, create the first color box with another div like this:
<div id = “color1”><div>
Within this div, create a paragraph that will display the hexadecimal color code; this would be manipulated by our JavaScript later.
<p id = “txt-1”></p>
Finally, create a button like this:
<button id = “btn-1”>Copy</button>
When you are done with the first div, everything should look like this:
<div class="first">
        <input type="color" name="" id="select1">
        <div id="color1">
            <p id="txt-1"></p>
        </div>
        <button id="btn-1">Copy</button>
    </div>
Repeat this for the second, third, and fourth divs and change the values of the ids chronologically, i.e. the input id for the second div should be select2, the color box div should have an id of color2, the paragraph should have an id of txt-2 and the button should have an id of btn-2.
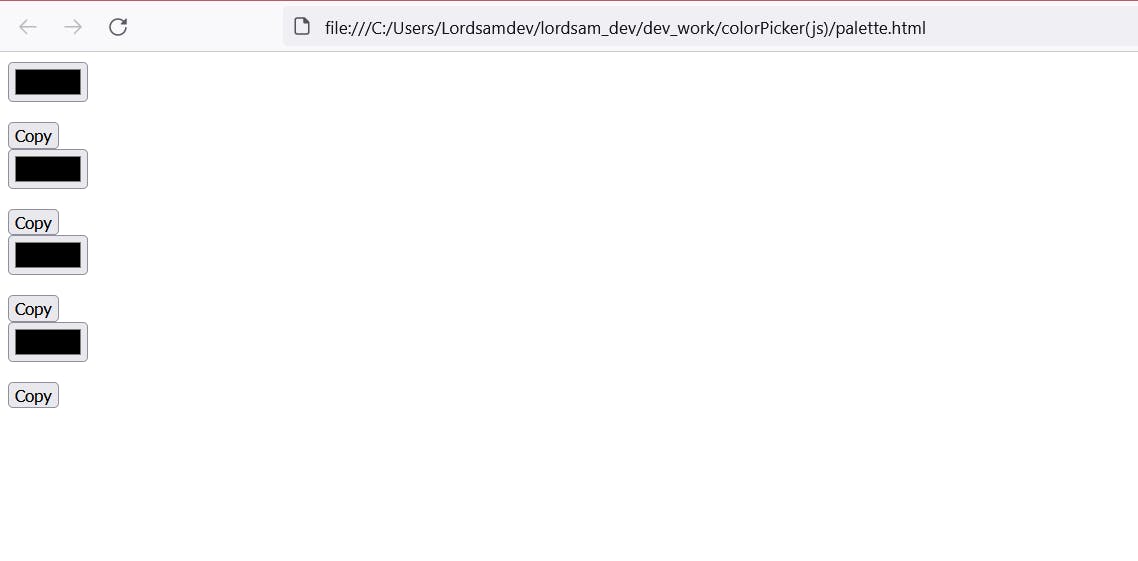
Once you are done with these, you should have something that looks like this screenshot:
When you have something like this, congratulations we can now move to the next step.
Step Two: Create The CSS: in your code editor, create a CSS file, give it any name you desire but I call mine palette.css for simplicity. I assume you know how to link CSS files to HTML pages, if not, this is the code:
<link rel="stylesheet" href="palette.css">
Make sure this code is within the head tag of your HTML!
Now it is time to write some CSS: Begin by styling the body tag, I used CSS Flexbox by simply doing this:
body{
       display: flex;
}
I want everything in the body tag to be in a column, i.e. on top of each other instead of side by side, this is achieved by the following code:
flex-direction: column;
To centralize everything in the body tag, use the following code:
align-items: center;
justify-content: center;
Then I gave the background color a sweet blueish color like this:
background-color: #59d6df
That is all for the body tag, next is the main div, style it like this:
.main{
    display: flex;
    flex-direction: row;
    align-items: center;
    justify-content: center;
}
Next, style the button (optional), you can change your values to suit yourself:
button{
    margin-bottom: 10px;
    padding: 10px;
    border-radius: 25px;
    border-color: blue;
    background-color: #fff;
    color: blue;
    font-family: 'Trebuchet MS', 'Lucida Sans Unicode', 'Lucida Grande', 'Lucida Sans', Arial, sans-serif;
}
After styling the button, style each of the color boxes, giving them a default color and dimensions, e.g. for the first box, do something like:
#color1{
    display: flex;
    justify-content: center;
    width: 100px;
    height: 50px;
    background-color: red;
    margin-bottom: 10px;
}
Repeat for all the four color boxes.
Optionally, you can style the color pickers to give then a circular look instead of the default rectangular look, use this code:
#select1{
    border-radius: 50%;
    padding: 20px;
    border-color: gold;
    width: 20px;
    height: 20px;
    margin-left: 0;


}
Important note: I repeated the above code four times in the code, this is not optimal but since I used an id instead of a class, I have to style each id individually.
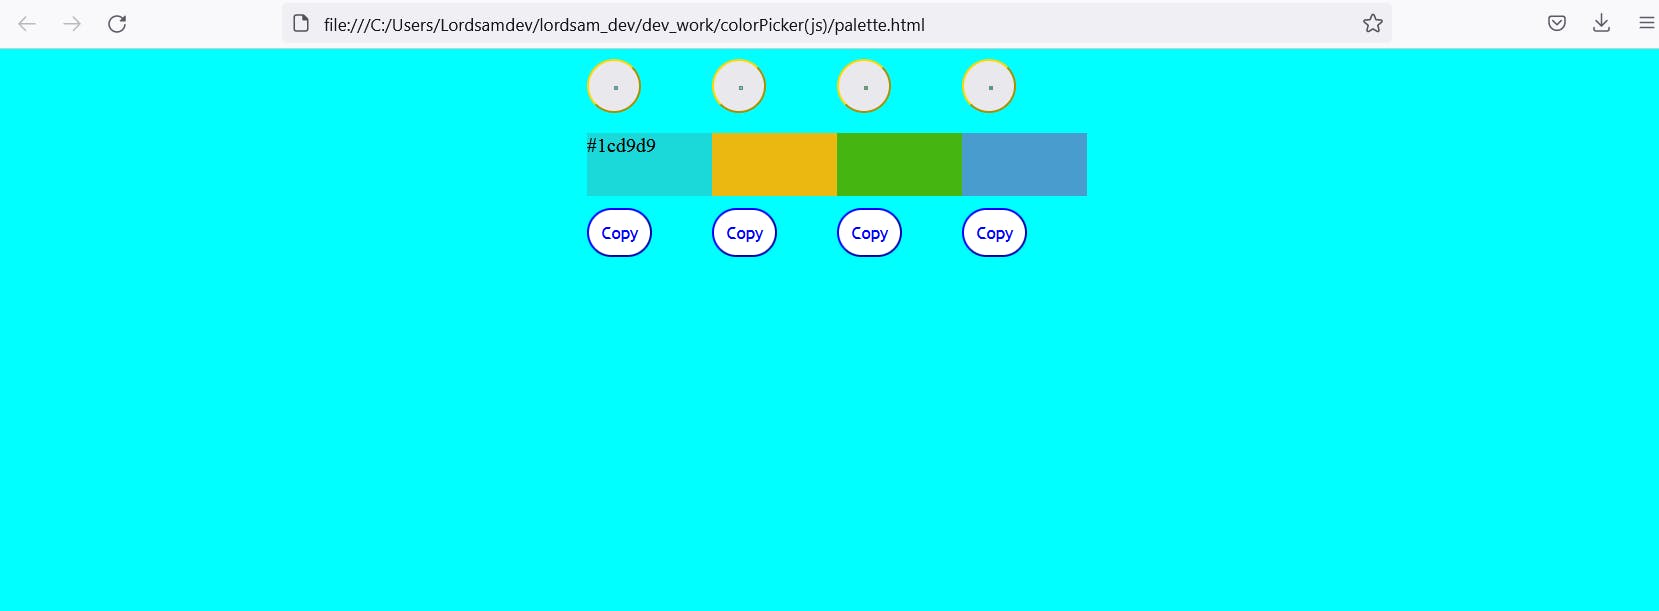
Once this is done, you should have something like the screenshot below:
In the next part of this article, I will teach you the JavaScript part of this project. Full code is provided here %[github.com/Lordsamdev/Color-Palette].
Peace!